Wednesday 23 November 2016

Replace Backquotes with Brackets for Command Substitution

If there is a script which has got backquotes around some commands to assign them to a variable, it can be useful to replace the backquotes with the easier to read but less portable $(...).
ie if you have the following piece of code:
currdir=`pwd`
and want to replace it with
currdir=$(pwd)
then, in Notepad++ use the following in the find and replace menu:
Find: `(.*)`
Replace: \$\($1\)

Tuesday 7 October 2014

Stress Testing A Linux Box


Using Fedora's Stress Command


To stress test the machine, we should install the stress command.

Login as root

If the compile tools are not installed then install them:
yum install gcc gcc-c++ autoconf automake Then install the command itself: wget http://pkgs.fedoraproject.org/repo/pkgs/stress/stress1.0.4.tar.gz/a607afa695a511765b40993a64c6e2f4/stress-1.0.4.tar.gz
tar zxvf stress-1.0.4.tar.gz
cd stress-1.0.4
./configure
make
make install
To do the stress tests themselves:

Stress CPU for 10 minutes: stress –c 5 –t 1200s Stress Memory for 10 minutes stress –m 10 –t 1200s Stress disk io for 10 minutes stress –d 10 –t 1200s The first command will push CPU to 500%. It only works on one core, so it may need to run several time simultaneously, depending on how many cores there are. The second command produces 10 spinning process, and the third 10 spinning disk write processes.

The commands can be combined (-c 5 –m 10 –d 10 –t 1200s).

Using A Script

But what if the system is locked down and the stress command cannot be installed? It is possible to perform the stress test using scripting instead. The following scripts do the job.

This script should hammer the CPU load. It runs a huge number of awk calculations as several background processes
#!/bin/bash
if [ $1 ]; then
        NUM_PROC=$1
else
        NUM_PROC=10
fi

uptime

for i in $(seq 1 $NUM_PROC ); do
   awk 'BEGIN {for(i=0;i<10000;i++)for(j=0;j<10000;j++);}' &
   pidarr[$i]=$!
   echo ${pidarr[$i]}
done

ps -fp "${pidarr[*]}"

uptime
We can use dd and a variation of the above script to thrash the disk IO:
#!/bin/bash
if [ $1 ]; then
        NUM_PROC=$1
else
        NUM_PROC=10
fi

for i in $(seq 1 $NUM_PROC ); do
   dd if=/dev/sda of=/dev/null &
   pidarr[$i]=$!
   echo ${pidarr[$i]}
done

ps -fp "${pidarr[*]}"
And for memory, we can use another variation:
#!/bin/bash
if [ $1 ]; then
        NUM_PROC=$1
else
        NUM_PROC=2
fi

BS=$(free | grep "^Mem" | awk '{print $2}' | head -1)

for i in $(seq 1 $NUM_PROC ); do
   dd if=/dev/urandom bs=$BS of=/dev/null count=1050 &
   pidarr[$i]=$!
   echo ${pidarr[$i]}
done

ps -fp "${pidarr[*]}"
This caches huge blocks of random numbers (using a block size of the total amount of used space in the system). Doing it a couple of times simultaneously will do the trick.

Thursday 2 October 2014

Windows New Lines Cause \r Scripting Errors

Using notepad++ to write Linux or Unix shellscripts creates scripts where each line ends in Windows format <line feed><carriage return> rather than Unix format <carriage return> new lines.

This will typically throw up an error when trying to run a script, for example:

$ ./dbusers.sh -s UC1 -rUC2 user1 user2 user3
./dbusers.sh: line 33: $'\r': command not found
./dbusers.sh: line 36: syntax error near unexpected token `$'in\r''
'/dbusers.sh: line 36: `   case $value in

This can be fixed in notepad++ in the Settings menu:

Settings / Preferences / New Document and change the Format (Line ending) to Unix/OSX.


This only applies to new documents, so close any shell scripts which are open for editing in Notepad, then convert them in Linux to get rid of the extra line feeds. This can be done either using a sed command, or the dos2unix command. Not every distribution has the dos2unix command but sed is universal.

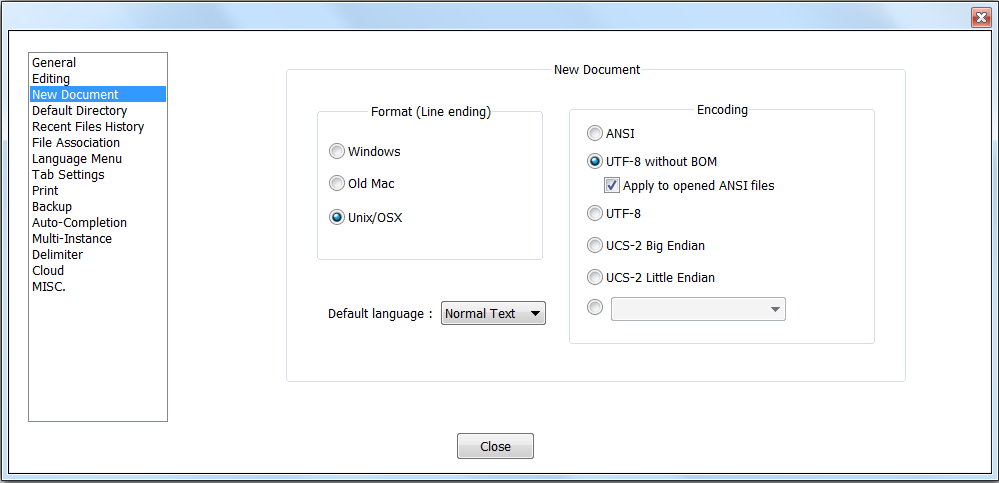
sed -i 's/\r\n/\n/g' <script>

This simple sed command searches for <linefeed><carriage return> (\r\n) and replaces it with a simple <carriage return> (\n).

The script can now be loaded back into notepad++ where it will work correctly.

Saturday 28 June 2014

Create a Solaris Zone Using a Here Document

Creating a new zone in Solaris takes several steps and is a laborious task, especially if several zones are to be created at once. The process can be sped up by setting up the details of the new zone in variables, then sending all of the commands into zonecfg using a here document.

The code below assumes two network interfaces, and that the zones are stored in /zones. It should be customised as required to add filesystems, memory capping etc (see Further Options, below).

First set up the zone name ($NAME), the number of cores ($CORES), the two network interfaces ($IF1 and $IF2)[1] , and IP addresses ($ADD1 and $ADD2):
NAME=amypond
CORES=2
IF1=hre228001
IF2=hre229001
ADD1=172.21.138.107
ADD2=172.21.139.107

Copy and paste the following to the command line (all in one go):
zonecfg -z $NAME <<EOF
create
set zonepath=/zones/$NAME
set autoboot=true
set bootargs="-m verbose"
add dedicated-cpu
set ncpus=$CORES
end
add net
set physical=$IF1
set address=$ADD1
end
add net
set physical=$IF2
set address=$ADD2
end
info
verify
commit
EOF
zoneadm -z $NAME install
zoneadm -z $NAME ready
zoneadm -z $NAME boot


Further Options

To add a CD-ROM, add the following lines immediately after an end command above:
add fs
set dir=/mnt
set special=/cdrom
set type=lofs
add options [ro,nodevices]
end

To mount a filesystem from the global zone, amend and add the following lines immediately after an end command above:
add inherit-pkg-dir
set dir=/opt/sfw
end

To add memory capping, amend and add the following lines immediately after an end command above:
add capped-memory
set physical=50m
set swap=100m
set locked=30m
end

Further configuration can be done via the console:
zlogin -C $NAME


[1] These can be obtained from an ifconfig -a on any of the other zones on the host.

Tuesday 17 June 2014

Always Use Sudo

This is part of a series of articles on Red Hat Server Hardening.

Nobody - not even administrators - should ever log in as root unless absolutely necessary. If an administrator needs to run a command with root privileges, they should use sudo.

The sudo tool allows ordinary users to have limited root level administrative access for certain tasks. This allows users to perform specific superuser operations without allowing them full superuser status.

To use sudo to run a command, precede it with the sudo command:
sudo date

The first time a user issues a sudo command during a login session, they will be prompted to enter the administrative password.

The accounts capable of using sudo are specified in the /etc/sudoers file, which is edited with the visudo utility. This file lists users and the commands they can run, along with the password for access (unless the NOPASSWD option is set, then users will not need a password).

A /etc/sudoers entry has the format
     user     host=command

userThe name of the user being granted access
hostA host on the network. For all hosts, use ALL.
commandA list of one or more commands, qualified by options such as whether the password is required. For all commands, use ALL.

So, for example, to give user paul full root-level access to all commands on all hosts:
paul   ALL = ALL

To run as another user, instead of as root, place the alternative user in parentheses before the command. For example, to allow user paul to run as user ringo on the beatle host:
paul   beatle = (ringo) ALL

The command may have an option associated with it. Possible options are:

NOPASSWD /
PASSWD
Determines whether or not the user will require a password to run the command.
NOEXEC /
EXEC
If sudo has been compiled with noexec support, this determines whether or not an executable will be allowed to run further commands itself.
SETENV /
NOSETENV
Determines whether or not users are allowed to override environment variables with the sudo -e command.
LOG_INPUT /
NOLOG_INPUT
Determines whether or not the input to the command is written to the log file.
LOG_OUTPUT /
NOLOG_OUTPUT
Determines whether or not the output from the command is written to the log file.
By default, relevant logs are written to /var/log/secure.

Therefore, to allow user paul to run the kill command on beatle with a password, but to run the lprm command without a password:
paul   beatle = PASSWD: /usr/bin/kill, NOPASSWD: /usr/bin/lprm

A user can see what commands he or she can run by running: sudo -l

Installing Apache on Red Hat 6

Like most other things in Red Hat, Apache can be quickly and easily set up using the package manager. The process is simple. The only thing to remember is that the package and the service are not called Apache, but httpd.

Install Apache

Open a root shell
su -
Install the Apache web server:
yum -y install httpd
Configure the system to start Apache at boot
chkconfig httpd on
Start the Apache web server:
service httpd start

Test the Apache Installation

To test, copy and paste the following into /var/www/html/index.html:
<html>
<head>
<title>Dougie&#39;s Linux Hints Test Web Page</title>
</head>
<body>
This is a test Web Page.
</body>
</html>

Save the file. Then, still from the root shell, run the command:
elinks http://localhost
This will access the webpage created above, proving the web server is up and running.

Wednesday 11 June 2014

Remove KDE or GNOME From Linux

X Windows desktops like KDE or GNOME are not required on a server, and waste valuable resources. These should therefore be removed:
yum groupremove “X Window System”

This will remove around 100-150 packages from the server.

Doing this will prevent an intruder from starting an X-Windows session on the server by typing startx at the shell prompt.

Installation of X-Windows can also be completely prevented during initial system installation.